
How to Clean Your Bike Efficiently without removing the wheels in 7 steps: a practical Guide
We all love riding our bikes. But let’s be honest. Who enjoys cleaning them? Still, there’s no way around it when your ride ends in wet, filthy conditions and your bike’s caked in mud and grit. At that point, it’s clear it needs some love. And even if the weather’s been kind for a few rides in a row, it’s still worth giving your bike a proper once-over now and then.
After nearly 30 years of riding and cleaning bikes, I’d like to think I’ve learned a thing or two. About six times a year, my road bike gets the full treatment. Stripped down, inspected from through-axles to brake pads, pulley wheels to bottom bracket. Everything gets cleaned, checked and re-greased.
But most of the time, when I have to clean it, I get it done in only 15 minutes. The wheels stay on. No faff. Just an efficient routine that keeps the bike running smoothly and looking sharp.
So, I figured it might be helpful to walk you through that exact process. Step by step. Quick. Effective. No-nonsense.

Optimal Tools and Products You Need for A Quick Bike Cleaning Routine
If you want to clean your bike quickly, having the right kit makes all the difference. That said, I’m not a fan of overcomplicating things. Or overspending for the sake of it. As with most things in life, it’s about balance. Here’s what I’ve found works best for this 15-minute routine.
Essential Tools for a Quick Clean
A bucket of soapy water
Any 10–20L bucket will do. Just make sure it’s clean. No old sand or grime hiding at the bottom from your last go.
For soap, I keep it simple. A splash of classic dish soap in warm water does the trick. Sure, some will say dish soap can damage seals or paint over time, but in my experience, it’s been totally fine.

A water hose, or something like it
A garden hose is perfect. But if you don’t have one, a bucket of clean water works. In a pinch, even your shower or a few water bottle squirts will do the job.
One quick note: I’m not a big fan of pressure washers. If you’re using some soap and a proper drivetrain degreaser, dirt should come off easily. Less aggressive, and you’re not blasting water where it doesn’t belong. Like into your bearings.
The right brushes and cloths
Using the right brushes is not where you want to cut corners and save money. Having the proper tools makes the job easier and quicker.
Get yourself the right brushes. A set of regular dishwashing brushes like these, and set of proper Drivetrain Detailing Brushes for the drivetrain. Also very handy, a Cone Brush like this one.
Furthermore, a bunch of soft handy sponges like these and a regular soft car wash brush like this. Important that these are soft so they don’t scratch!
Lastly, an old dry towel and any set of microfibre cloth from Amazon or the supermarket.


Using the Right Cleaning Products
When using the right tools matters, I’d argue that using the right degreasers and lubricants matters even more. So if you’re looking to dial in your setup for degreasing and lubricating, here are products I can genuinely recommend!
BBB Bio Drivetrain Cleaner Degreaser – deep-cleans your entire drivetrain with minimal effort
Cyclon Brake Cleaner– quickly removes grime, oil, and contaminants from your rotors and brake pads
Squirt Chain Wax – wax-based lubricants that keep your chain running buttery smooth
Cyclon Polish Wax – adds a fresh, satin-like finish to your frame and parts


The 15-Minute Cleaning Method
Let’s get to work! You’ve got the tools, now here’s how to use them step by step.
Step 1: Initial Rinse (1 minute)
Give your bike a quick rinse with clean water to remove loose dirt and grit. Use a hose if you’ve got one. If not, a bucket of clean water or even a few squirts from your water bottles will do. The goal here is pre-cleaning. Removing the obvious mess before you get into the details.

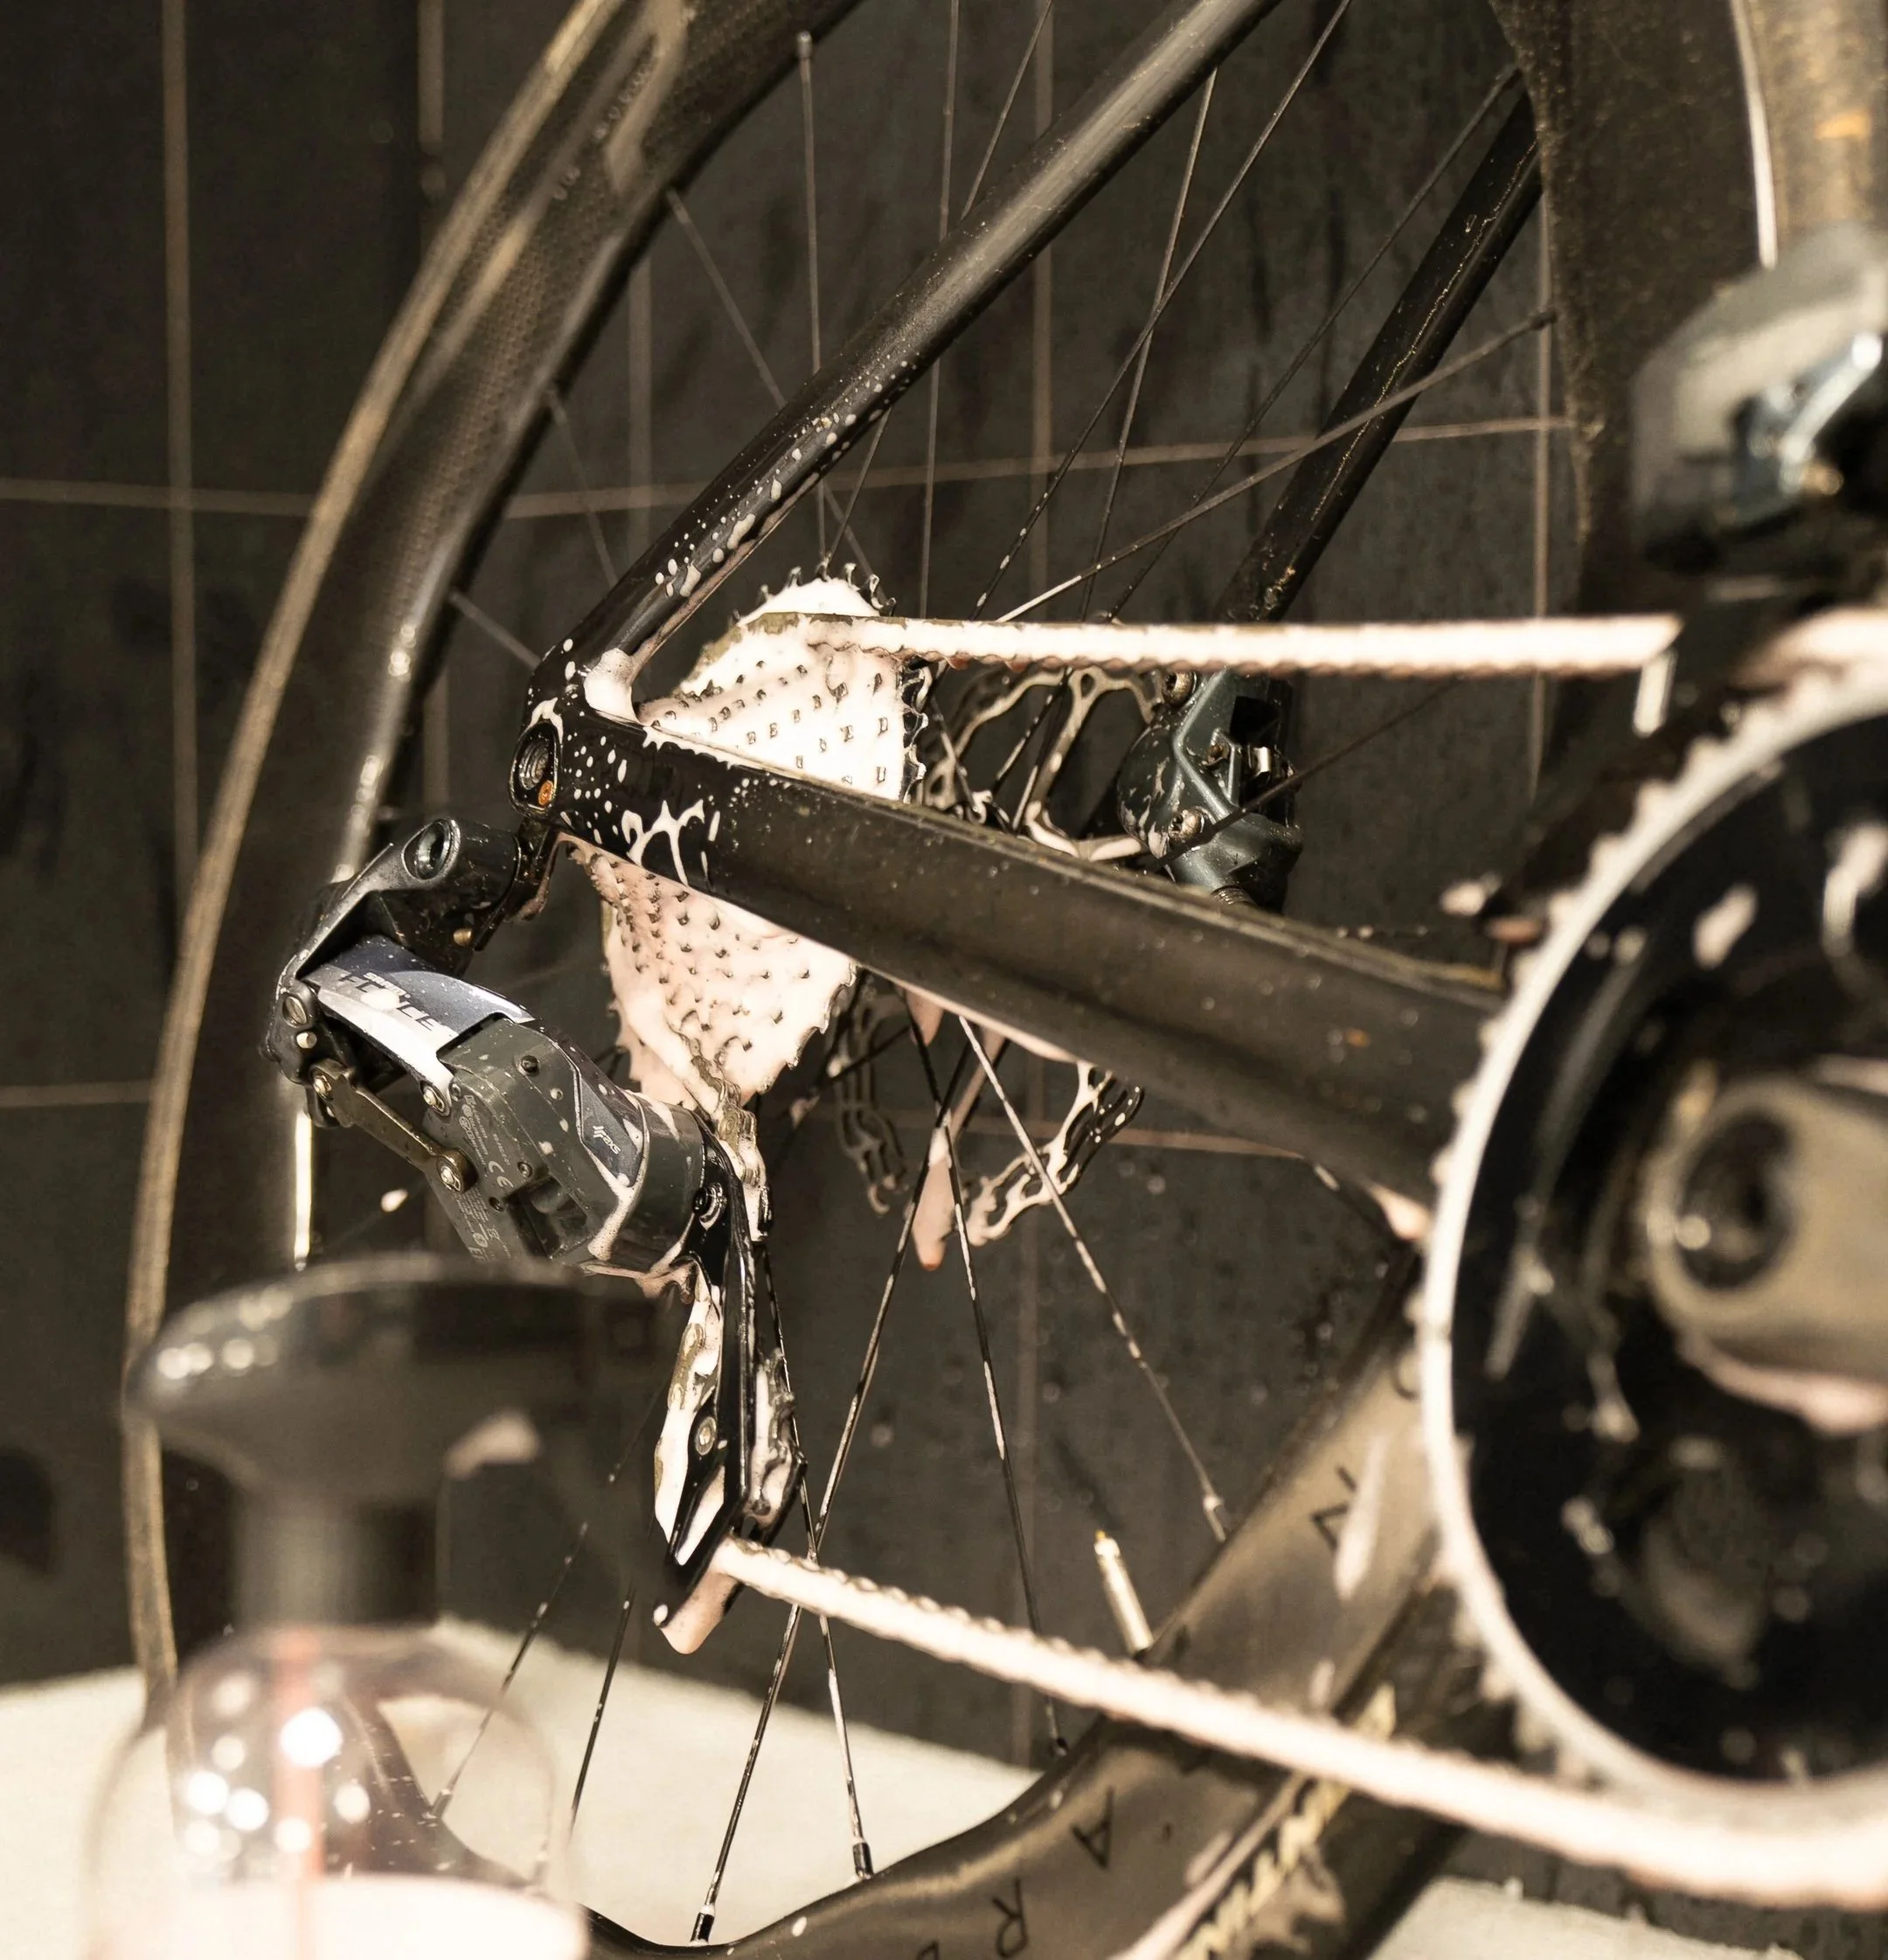
Step 2: Applying drivetrain Degreaser (1 minute)
Spray the Bio Drivetrain Cleaner straight onto the chain, cassette, derailleur, and crankset. Spin the cranks backwards to coat every chain link and cassette cog.
Then let it soak for 5–10 minutes. While that’s happening, get your soapy bucket and brushes ready.
Step 3: Main and Detailed Washing (5 minutes)
As with cleaning pretty much anything, start at the top and work your way down. Dirt follows gravity, so the mess ends up low, which is exactly where you want to finish.
I always do frame and parts first, top to bottom, except for the derailleurs. Then the wheels. And finally, the dirtiest bit: cassette, chainrings, chain, and derailleurs. Leave the greasy business for last.
Cleaning the frame and other parts is what I usually do with a soft sponge and soft brush. Whatever gets the job done without making scratches. Don’t forget the underside of your saddle, which is always messier than you think. For the tighter spots around the hubs or tucked behind the crankset, I swear by a cone brush.
For the wheels, you’ll want to use the same tools. The soft sponge or soft brush. Perfect for tyres, rims, spokes, and rotors. Then, grab your Cone Brush again for the hubs and to get into every other nook and cranny.
Now for the drivetrain. Start by scrubbing your cassette with the dishwashing brush. Give it a good scrub. Even if the results won’t show until you rinse. The inside is easiest to clean just before it runs through the rear derailleur. The outside is best done right on the cassette. Tackle the sides on the outer chainring if you’re running a double. Don’t forget to give your derailleur pulley wheels a bit of love too. And last but not least, rinse the whole drivetrain and both derailleurs.


Step 4: Rinsing and Drying (3 minutes)
Rinse your whole bike again. Then dry with a towel from top to bottom. Frame, saddle, bars, derailleurs, wheels. Don’t forget the hubs and rotors. Use the towel edge to get between cassette cogs and run the chain through it until dry.

Step 5: Brake Cleaning (2 minutes)
For top-notch braking power, your brakes need to be free from grime and grease. Time to put the Brake Cleaner to work. Both on the rotors and the brake pads. Start by spraying a bit onto one of your Microfibre Cloths and give one rotor a good wipe. Repeat for the other side. Then the other rotor. Then, spray a small amount onto the edge of the cloth and carefully pull it through the callipers, letting it pass between the disc and the pads. Do this for both sides, both callipers. Save the cloth you’ve been using for this job only, so it doesn’t mix with other grease and grime!
Step 6: applying chain wax (2 minutes)
Now, let’s apply some chain wax. I highly recommend Squirt Chain Wax for this reason. Apply one drop per link, only on the inside of the chain. Take your time and be precise. One drip is plenty. Go overboard, and you’ll find out just how messy things can get after just one or two rides. For best results, let it sit for at least 2–3 hours before heading out again. Good things take time. Even a smooth-running bike chain.

Step 7: Applying Protective Wax (2 minutes)
Finish it off with the Cyclon Polish Wax. Use another Microfibre Cloth to polish the frame and wheels. It only makes sense that you skip the drivetrain and rotors.
This stuff adds shine, protects from dirt, helps prevent scratches, and works on all frame types. Carbon, paint, matte or glossy.
At this point, your bike should look and feel box-fresh. That’s the magic of a good routine. Well done!
